Template-driven forms in Angular
Forms are one of the most common elements of webpages and business applications. You use forms every day to log in and register, place and order, fill in your contact informaction, change settings and many other activities. In this post I would like to show you how to create, validate and submit forms using the tools provided by Angular.
Simple form example
To use template-driven forms in Angular, you need to import FormsModule from @angular/forms.
Let's create a simple form:
<form>
  <input placeholder="Name" />
  <button>OK</button>
</form>
As you can see in devtools, Angular is controlling our form:

Angular adds an NgForm directive during parsing a template. To get an instance of NgForm we can create a local template variable using ngForm as the key. For example, create contactForm variable and pass ngForm as a key:
<form #contactForm="ngForm"></form>
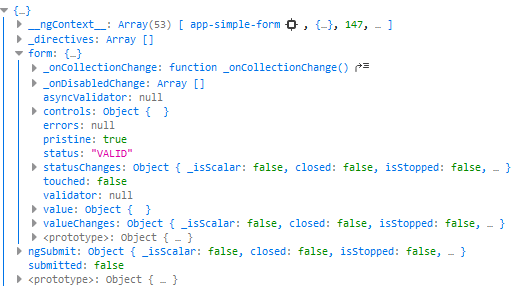
Now let's look what's inside this contactForm variable:
Form value
value property is now an empty object. It's because we need to tell Angular about every form field. Let's add ngModel directive to our input. When using the ngModel within <form> tags, you'll need to supply a name attribute so that the control can be registered under that name.
<input ngModel name="firstName" placeholder="Name" />
Looking into inspector, we can see that Angular added some properties to input:

Also, value property is now an object containing our input value (using input's name as a key):
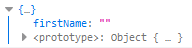
Typing anything into our input results in updating this object. Update occurs after every character.
Data binding
Sometimes though, you want to populate the form before it's presented to the user. To achieve this, you need to create data model for your form. Let's expand our form:
<form #contactForm="ngForm">
  <input ngModel name="firstName" placeholder="First name" />
  <input ngModel name="lastName" placeholder="Last name" />
  <button>OK</button>
</form>
Now we can create an interface that reflects form:
interface ContactForm {
  firstName: string;
  lastName: string;
}
Then in component create variable using ContactForm interface as a type that will contain form data with initial values.
contactFormData: ContactForm = {
  firstName: 'Sherlock',
  lastName: 'Holmes',
};
Having everything set up, you can take advantage of two-way data binding - feature that allows for watching variables for changes and reflecting any changes in application state. To do this, wrap ngModel in [] and () parentheses like this (also known as banana-box syntax):
[(ngModel)]
As a value, set corresponding variable from data object:
<input
  [(ngModel)]="contactFormData.firstName"
  name="firstName"
  placeholder="First name"
/>
<input
  [(ngModel)]="contactFormData.lastName"
  name="lastName"
  placeholder="Last name"
/>
Let's log form value now:
We can see that form is filled with initial values during component initialization. Now, when user changes input value, Angular updates contactFormData object.
Form validation
Before we talk about validating forms with Angular let's do quick recap about HTML5 validation attributes.
requiredspecifies whether a field needs to be filled in before the form can be submittedminlengthandmaxlengthspecifies the minimum and maximum length of textminandmaxspecifies the minimum and maximum values of numerical input typestypespecifies what type data needs to bepatternspecifies a regex that defines a pattern the entered data needs to follow
If form is valid, it's element matches the :valid CSS pseudo-class. If is not, it matches :invalid pseudo-class. If the user tries to send invalid form, the browser will block this operation.
HTML5 validation in Angular
When using FormsModule, Angular turns off native browser validation by adding novalidate attribute to forms. Angular does this because of differences in validation behaviour between browsers, so if we want to have consistent behaviour, we need to use Angular validation methods. Nevertheless, if you want to, you can override this using ngNativeValidate and reenable native validation
<form #contactForm="ngForm" ngNativeValidate>
  <input
    [(ngModel)]="contactFormData.firstName"
    name="firstName"
    placeholder="First name"
  />
  <input
    [(ngModel)]="contactFormData.lastName"
    name="lastName"
    placeholder="Last name"
  />
  <button>OK</button>
</form>
As we can see, novalidate is gone.

You can also use ngNoForm to tell Angular not to take handle of particular form.
Validation classes
Angular automatically mirrors many control properties onto the form control element as CSS classes. They come in handy when you need to style elements according to the state of the form. Angular adds following classes:
.ng-valid- control is valid according to validation attributes.ng-invalid- control is invalid according to validation attributes.ng-pending- async validation hasn't finished.ng-pristine- control value was not modified.ng-dirty- control value was modified at least one time.ng-untouched- user never interacted with the control.ng-touched- user has interacted with the control at least one time
For example - if you want to add red border to invalid input field, you can do it by applying style to .ng-invalid class:
input.ng-invalid.ng-touched {
  border: 1px solid red;
}
You usually want to add ng-touched to prevent errors on initially invalid forms. It's a bad UX practice to present an error before user interacted with a field.
ngModel properties
Besides adding classes to control elements of the form, Angular adds corresponding properties to the ngModel object. To access these values, export the directive into a local template variable using ngModel as the key:
<input
  [(ngModel)]="contactFormData.firstName"
  name="firstName"
  placeholder="First name"
  #ctrl="ngModel"
/>
Let's log ctrl variable:
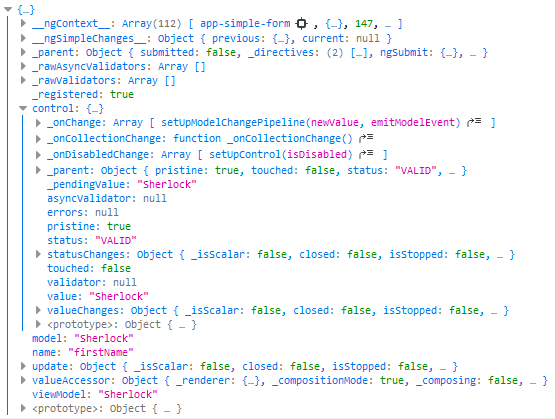
As we can see, there is a ton of information about our form control. You can get those values from control property. Some properties fall through to the control for direct access. See a full list of properties directly available in AbstractControlDirective. You can access them directly, for example ctrl.valid.
Form events
Handling HTML5 events
We are able to handle every HTML5 event in Angular. User actions such as clicking a link, pushing a button, and entering text raise DOM events. To respond to the event in Angular, you can use Angular event bindings. To bind to a DOM event, you need to surround the DOM event name in parentheses and assign target function to it. For example, let's handle blur event. HTML onblur event occurs when an object loses focus. To handle blur event, assign handler as presented:
<input
  [(ngModel)]="contactFormData.firstName"
  name="firstName"
  placeholder="First name"
  (blur)="handleBlur()"
/>
And create assigned function
handleBlur(): void {

}
Usually though, you want to get user input or other data about triggered event. To achieve this, you need to pass $event object to your handler function.
<input
  [(ngModel)]="contactFormData.firstName"
  name="firstName"
  placeholder="First name"
  (blur)="handleBlur($event)"
/>
handleBlur($event: FocusEvent): void {

}
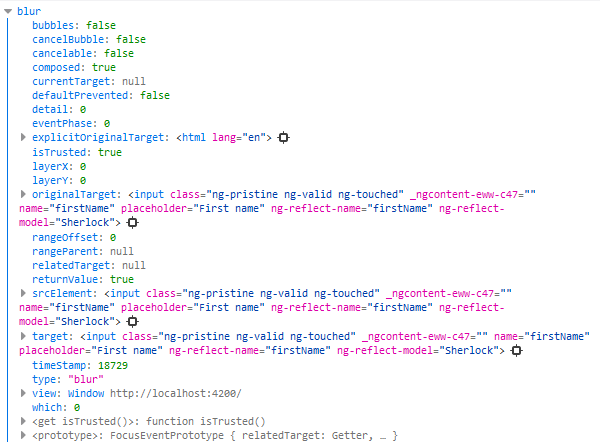
You may be confused - why do we use FocusEvent as a type instead of something like BlurEvent? The FocusEvent represents focus-related events, including focus, blur, focusin, and focusout. There is no specific event for blur. With this knowledge, let's log $event and see what data it contains.
handleBlur($event: FocusEvent): void {
  console.log($event);
}
Listening for form submission
The ngSubmit event emits the form submission event. Let's listen to this event:
<form #contactForm="ngForm" (ngSubmit)="onSubmit(contactForm)"></form>
Now, create onSubmit function and pass the form to it
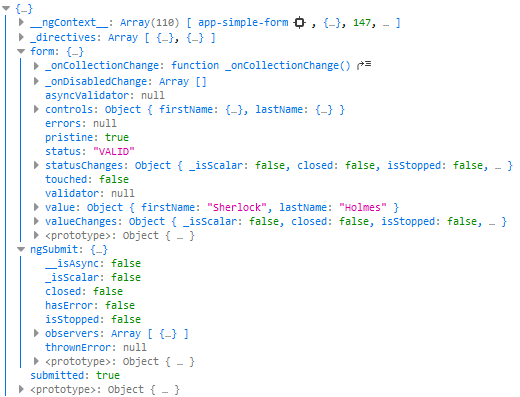
onSubmit(contactForm: NgForm): void {
  console.log(contactForm);
}
To use NgForm type, import NgForm from '@angular/forms'. In this function, you can perform any validation before the form is submitted. Now, add type="submit" to the button to ensure, that it will submit the form. Different browsers may use different default types for the <button> element, so be sure to do that.
<button type="submit">OK</button>
We can now submit the form and see what is logged in onSubmit function: